A lot of people enjoy picture taking while travelling. Some of us do this to express ourselves through the art of photography, while the others capture important moments with a camera. The question is – how to make the photos beautiful and eye-friendly? In this article you will find an answer!
Before editing
Plan your shots and time
One of the most essential tips, but not every photographer or designer follows it. It does not depend on the quality of your equipment but on the basic idea. Before starting shooting and editing, work out the main theme or choose the ideal concept. Surf the Internet and look for inspiration on Instagram, Pinterest, or even Google Maps! Also check the sceneries in magazines or books, and it will be much easier to decide on the basic idea of your photos. It may take from a couple of hours to several days to think over the plan, but it helps to make the results more successful.
Time management is also important. If you want to take photos with no people in the background, arrive at the destination at a time when it is less crowded there. Work out the perfect route that doesn’t take much time and think of renting a vehicle. If you go together with your friends, then 9-seater car hire is a good option. You will be able to take a lot of people and bring the equipment you need. For those, who want to drive on their own, booking a 9-seater self-drive hire with rental24.co.uk is possible.
Know the equipment you use
The smooth shooting process is impossible if you don’t know the main features of your equipment. Whether you use a smartphone or digital camera, it’s important to know the basic functions. During the preparation, read a camera manual for comfortable camera usage. Spend a little time holding the device in your hands and try the buttons to adapt to them. Look through the settings for a better understanding. It will be much easier to use your camera afterward. If you shoot with a smartphone, check the software that you already have.
Make a list of the additional equipment needed for your device. It depends on the place which you choose for the photo session. Sometimes a reflector, tripod or camera lens might be needed. Think over the charger or power bank for a smartphone. The location, where you are going to take photos, affects the number of equipment you need to take. If you travel long distances, taking all the devices with you can be problematic. Minibus hire helps transport all the gadgets with ease if you can drive to the destination. If there is no possibility to rent a vehicle, then choose less equipment to make your journey light.
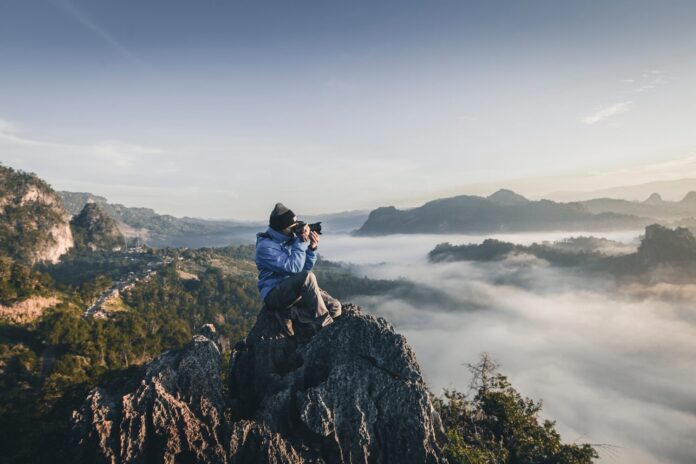
Move around, communicate with people
It may sound obvious, but this tip is also important for those who travel for good photos! Having arrived at the place, walk around and search for interesting frames. It provides you an opportunity to select the best angle for a photo of an object. Try to find where to use the main principles of the composition:
- Rhythm. It’s connected with the shapes or patterns that are repeated in a frame.
- Proportion. The components in your picture are sized adequately.
- Emphasis. When you highlight the importance of certain objects.
- Contrast. Use it to add life to your photos.
- Movement. It’s when you take pictures of the subjects while they’re moving.
You won’t be able to encounter the ways to use these principles by standing still. Sometimes you need to move a bit to catch an ideal rhythm or emphasize something in your photo.
While walking, try to communicate with other people. Travel photos can be not only the picturesque landscapes, but the moments with people you meet. Talk to the residents to find plenty of interesting moments to catch. Be polite and nice, and other people might even help to bring your ideas to life.
Use the long exposure
This tip is great if you have a tripod and patience. In photography, the long exposure helps you to obscure or smear the moving objects in the final image. People use this technique to express the time that is passing in front of their eyes. The long exposure also comes in handy when you need to add light trails of the moving objects or make the waters smoother. Use it when you want to take beautiful photos of the traffic or the waterfall.
People also use it to remove unnecessary moving objects. For example, if some person moves in front of the camera, they won’t be seen in the photo at the end. The following editing becomes easier. Depending on the basic idea of your travel photos, choose the most suitable duration of the exposure. Take 20 seconds, 1 minute, or even an hour!
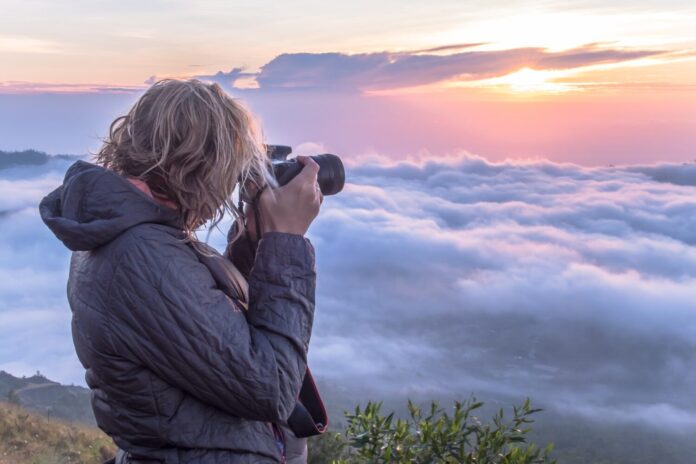
Ideal hours for photo taking

Taking photos during golden and blue hours is a great technique to use for travel photos. Golden hours come right before sundown or after dawn. At this moment, the camera catches the frames full of pleasant orange colours. Meanwhile, the blue hours are connected with the time right after sundown and before dawn. In this case, the cold colours prevail in the photos, taken at this moment.
Keep in mind that you have only 30 minutes to capture the golden hour. Work quickly and do not hesitate. Even though these hours appear at the expected parts of the day, you should be ready for unpredictable events.
While editing
Editing is an important process that is involved in design and photography. After the photo session, you might find different issues within the final pictures. For example, the colours might be plain, or there might be specific objects that you would like to remove from your images. Moreover, you might feel like adding something to the travel photos, like frames or text. That is why a huge number of useful software was created! With the tools available, you can transform your images into something that you really want to get at the end.
Computer software
Computer programs are complex and multi-tool, which makes them efficient for knowledgeable designers. Here is the list of amazing editing software!
Try Photoshop
Well-known graphic program for macOS and Windows. Developed in 1988, Photoshop has gained a great reputation as a raster images editor. The program is famous among digital artists for the variety of functions available. The software includes such features as alpha composing, masks and colour models. Alpha compositing is connected with creating an appearance of a full or partial transparency. Masks allow you to make the layers or image files visible and vice versa. Among the available colour models you can use CMYK, CIELAB, RGB, spot colour or duotone. All of these elements make photoshop perfect for editing images.
The menu of the software is complicated for beginners. It consists of great amount of instruments, useful for travel photos editing:
- Magic Wand Tool. Try this instrument to select the portions of the picture with the same or similar colours.
- Lasso. Helpful for separating image portions for further editing. It allows you to select any part of your picture using your mouse.
- Move Tool. Allows you to drag the parts of your picture.
- Eyedropper. Helps you select colours within your picture for further usage.
- Crop. This instrument is for rotating and cropping images.
All these tools help to deal with the problematic areas of the pictures. It takes time to get accustomed to the software, but the result is always stunning!
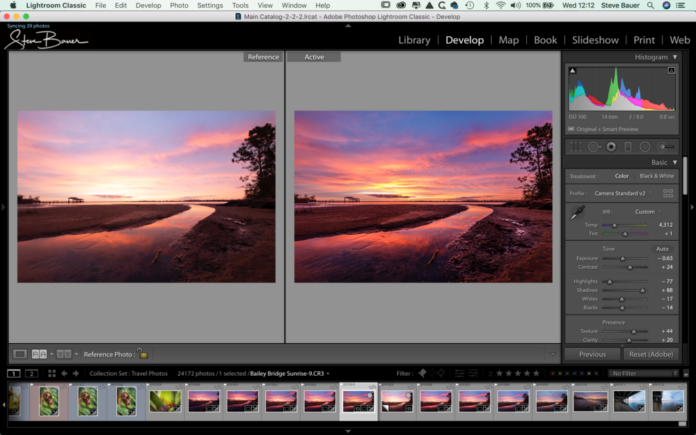
Colour correction with Adobe Lightroom
This is a perfect program for those who pay a lot of attention to colour correction in their photos. The full name of the software is Adobe Photoshop Lightroom. Developed by Adobe Inc., it serves as an amazing image manipulation program that is available for both Windows and macOS. While in Photoshop you can add or remove specific parts of the image, in Adobe Lightroom the original picture is kept separately from any changes. At the same time, this program serves as a library that is used for organising photos. Adobe Lightroom also supports such image formats as PSD, JPEG, TIFF, CMYK and PNG.
Colour correction is important for designers and photographers. Sometimes the light is not proper, or the palette within the photo is not eye-friendly. That’s where the special tools of Lightroom can help. With this software, you can try various useful functions for the travel photos:
- Clarity tool. It darkens the black areas of the photo for a better contrast. This instrument is good for editing landscape photos.
- Graduated Filters. Put a gradient over the image and emphasise more details of the photo. Helpful for editing the sky in the pictures.
- Vignette. This instrument adds a specific atmosphere to a photo.
Plenty of other tools are available in Lightroom. Try it, if you are interested only in colour correction and photos organisation.
Amazing ideas in Canva
Originally, it was developed by Melanie Perkins in Australia. You can try Canva both on Windows and Mac. The number of users reached 750,000 users during the first year. Canva serves as a famous platform for working with any sort of visual content. If you are interested in uploading your travel photos to popular social media, making presentations, posters or even documents – then it’s a good reason to try this software. The platform has options, such as Canva Pro, that you have to buy, but there are plenty of free tools too! The software is also famous for the different templates, provided to make editing easier.
Canva has a simple menu that is convenient to use. The variety of features depends on the basic idea that you follow. If you search for a while, you will find flyers, brochures or business cards in the library of samples. You can also find some interesting templates for social media, such as Instagram, WhatsApp, YouTube, Facebook, and even TikTok! The samples are already sized perfectly, but you can customise them. Upload the travel photos and edit! Change the layout’s background, create a collage, add text or stickers to your images. Your travel photos will look completely different after editing in Canva!

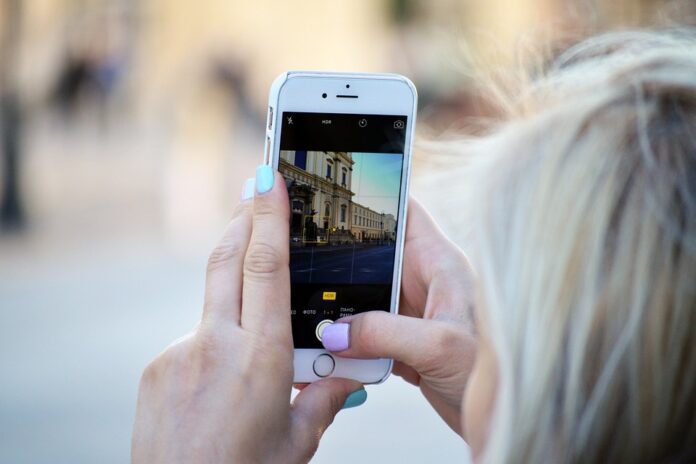
Smartphone applications
While travelling, some people prefer using smartphones for photography. It’s portable, and there is a possibility to edit the photos straight after shooting. Here are some interesting applications to use while working with the travel photos!
Software for image cleaning
Sometimes certain unwanted objects appear in front of the camera of your device, ruining the ideal shot. Photoshop Express can help you to deal with this problem. The application is free-to-use, but there are also some paid options.
The essential instruments for cleaning unwanted objects are Patch Tool, Spot Heal and Clone Stamp. For example, Patch Tool is a kind of brush that can repair the original photo and deal with unwanted elements. The application provides an opportunity to customise the instruments. Be aware that Photoshop Express sometimes glitches if you use Spot Heal sometimes.
Colour correction applications
VSCO is an application that is famous for colour correction options. Developed by Greg Lutze together with Joel Flory, this mobile software provides a great variety of free functions.
VSCO offers simple and useful instruments. The menu of the software is convenient for beginners. Import your travel photos and start the colour correction process. The application provides a great number of free templates. For example, some filters are similar to the ones on Instagram. You can regulate the contrast, sharpness, clarity, temperature and even more!
Use our tips, and your travel photos will be amazing!


